Growth Splines
Growth Splines can (optionally) be utilized to control the length and direction of your fur shells.
Growth Spline Creation
See example workflows from Nvidia here
Best Practices
- When generating growth splines, try to generate less than 5,000. In general, less is better for (editing) performance.
- Some DCCs generate Nurbs Curves instead of Spline curves - NeoFur fully supports both!
- Set spline segments to a low number (minimum of 3) - This is the only data used anyway, so this will speed up the process and give you a clearer idea of what is happening. Having tons of segments per Spline will not improve quality - only decrease your productivity.
- Preview with "guides" in your software instead of hair geometry - This is a more accurate visualization of the data that will actually be utilized.
Growth Spline creation tips & tricks
- Make sure spline object and character mesh both have the same pivot when being exported.
- Epic’s FBX implementation does not understand spline data currently - this is why we access the FBX file directly via the fur asset.
- Skin pose can be an issue - you need your meshes skin-pose to match the splines position. If it doesn’t, the splines will be trying to influence the wrong areas of your mesh.
Spline Troubleshooting
- Make certain the pivot-point of your spline object and your mesh match! This is a common mistake
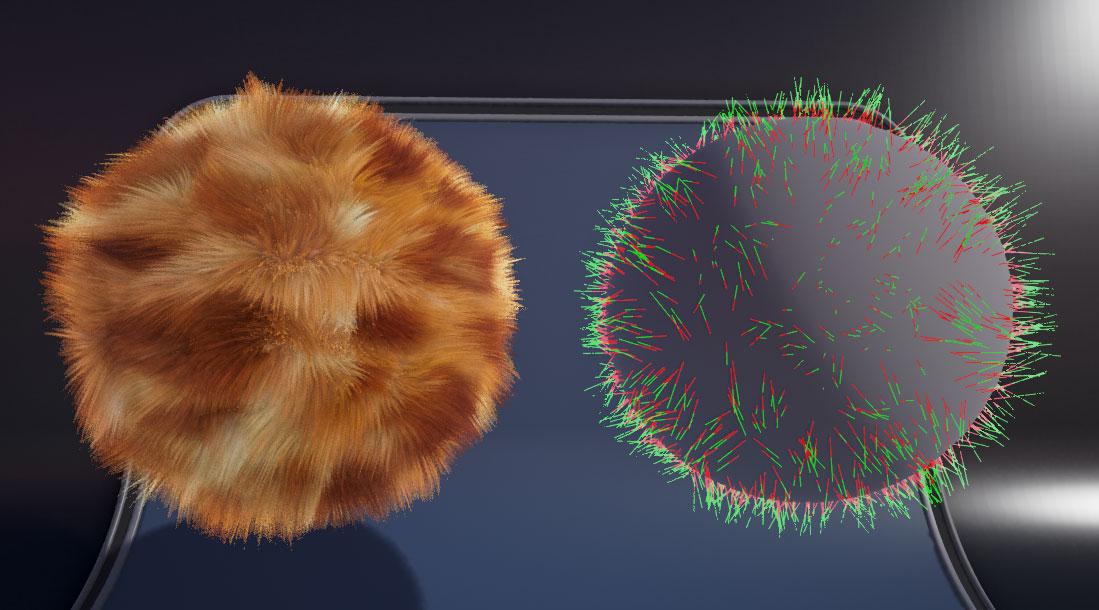
- Use the "spline debug" checkbox feature on the NeoFur component, this will help you see your splines in the scene and figure out what may be wrong with them.
- The expected pose of your splines should match the bind pose of your skeletal mesh, if you are using a skeletal mesh. An incorrect bind pose could cause issues.
Customer support service by UserEcho
