- NeoFur for Unreal
-
 Questions

Morph target from 3ds Max
I’m currently trying to integrate fur growth to my character only in certain areas. Similar to what your tutorial in the video attached demonstrates. However, I can’t really follow how the rigged mesh at 7:44 in the video is created. If I try to delete mesh triangles , in order to only have a morph target mesh. The skeleton and the mesh are no longer linked. I would be very helpful if you could walk us through those steps, I’m sure am I’m not the only can benefit from this.
G

Answer


Hey there!
The easiest way to create a modified growth mesh is to make a duplicate of your skinned mesh in 3ds Max. You can modify this duplicated mesh through an Edit Poly/Mesh modifier, which should retain any skin/rig bindings. My guess is that the way in which you're modifying the mesh is causing the skin/rig binding to be lost, which will cause the skeleton and mesh to no longer be 'linked', as you describe.
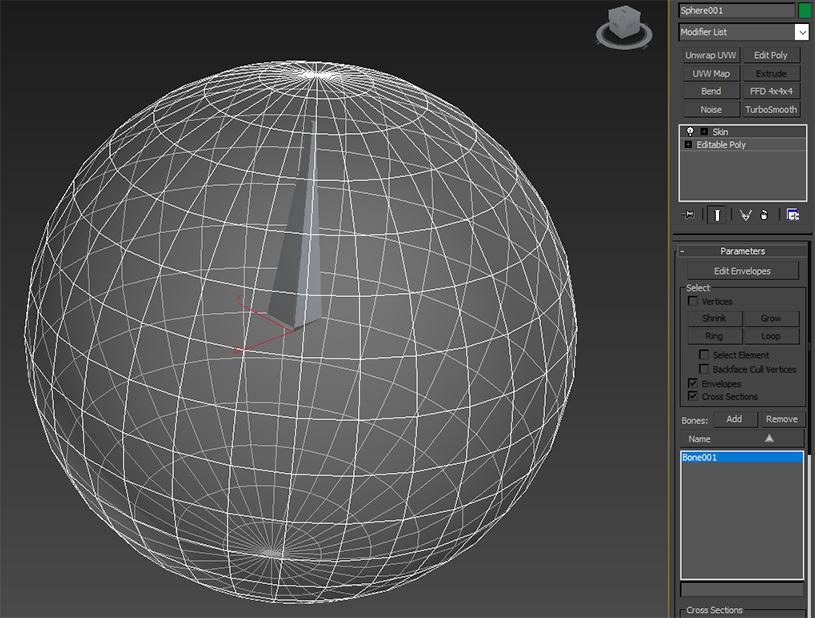
As an example for you, I set up this simple skinned sphere as a base mesh. The mesh and modifier stack look like this:
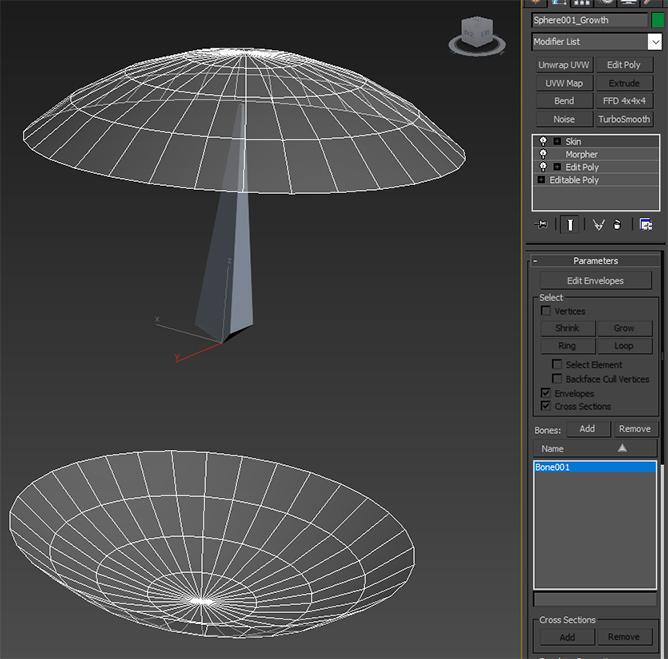
To create the growth mesh, I duplicated the skinned sphere object. Using an Edit Poly modifier, I deleted the middle portion of the sphere. I created my morph targets by using a copy of this modified growth mesh, and then set up the Morpher modifier. I'm making sure that any modifiers I add are beneath the Skin modifier in the stack. After doing all of that, the mesh and modifier stack now looks like this:
Once I set the appropriate growth mesh and morph target name in the NeoFurAsset, my object appears as expected - fur growth only occurs in the area defined by the growth mesh, and the movement of the growth mesh (and fur) matches the movement of the animated base mesh:
I hope this example is useful - please let me know if I misunderstood the issue you're experiencing or if you're continuing to have problems, so we can assist you further!
-Spencer
This is super useful, thank you so much. One thing though when I move the Morpher modifier under the skin modifier, it makes the mesh to drift upwards(and makes the rest of the faces to do move weidly) as it Morphes towards the reference mesh but if i have the Morpher above it only transforms the faces that I have modified

| Several famous brands in Pakistan offer a wide range of ready-to-wear <a href="https://www.shopatorient.com/collections/ready-to-wear">women formal dresses</a> that are both trendy and elegant. |
Ultimately, wearing a <a href="https://uae.khaadi.com/western/">ladies' shirt</a> is a personal choice and should be based on individual preferences and comfort.
This black shaded <a href="https://techatime.com/phenomenal-range-of-ready-to-wear-women-dressing-in-uae/">ladies’ kurta</a> would look very mesmerizing if you style it with black, or skin-colored pants perfectly.

Ultimately, wearing a ladies' shirt is a personal choice and should be based on individual preferences and comfort.
This black shaded ladies’ kurta would look very mesmerizing if you style it with black, or skin-colored pants perfectly.

If are in need of spray foam insulation services. Let Toronto Crown Insulation be your go-to stop this time!

Consider your personal style preferences and whether you require prescription glasses when selecting the male glasses frames for yourself.

I found this post very exciting. I am also sending it to my friends to enjoy this blog. celebrity leather
Customer support service by UserEcho

Hey there!
The easiest way to create a modified growth mesh is to make a duplicate of your skinned mesh in 3ds Max. You can modify this duplicated mesh through an Edit Poly/Mesh modifier, which should retain any skin/rig bindings. My guess is that the way in which you're modifying the mesh is causing the skin/rig binding to be lost, which will cause the skeleton and mesh to no longer be 'linked', as you describe.
As an example for you, I set up this simple skinned sphere as a base mesh. The mesh and modifier stack look like this:
To create the growth mesh, I duplicated the skinned sphere object. Using an Edit Poly modifier, I deleted the middle portion of the sphere. I created my morph targets by using a copy of this modified growth mesh, and then set up the Morpher modifier. I'm making sure that any modifiers I add are beneath the Skin modifier in the stack. After doing all of that, the mesh and modifier stack now looks like this:
Once I set the appropriate growth mesh and morph target name in the NeoFurAsset, my object appears as expected - fur growth only occurs in the area defined by the growth mesh, and the movement of the growth mesh (and fur) matches the movement of the animated base mesh:
I hope this example is useful - please let me know if I misunderstood the issue you're experiencing or if you're continuing to have problems, so we can assist you further!
-Spencer